1111 Shattuck
I began this project in March of 2008. This project was a renovation of an existing house in the Berkeley hills. The father of one of the clients, Bill Riddle, had completed floor plans and a basic drawing package but was unable to work out the final details, finishes, and on-site coordination. I took over the project in March of 2008. My role included helping with all the finish selections, details, precise layouts for the kitchens, bathrooms, windows, fixtures, etc.
Before we began work, my clients had a two story structure, but only the top level was habitable due to the steep hill under the house. We excavated the hill out behind their existing garage and created a full new lower level. Further, we stripped the Spanish style look from the façade and changed to a very Modern feel.
The synthesis between Architect, Owner, and Contractor on this project was wonderful. We all worked together to achieve a common vision which is rare on a project. The contractor worked hard to hit all the challenging alignments of shelving, cabinets, tile, etc. To get all these alignments right, they had to plan way ahead. In some cases the concrete placement affected the finish materials. They did a terrific job. Also, they had their own in-house cabinet shop to make all the cabinets which turned out beautifully.
Credits
-
Contractor:
- Lawrence Construction—Tom Lawrence
- http://www.lawrenceconstruction.biz
-
Photographer:
- Eyetone—Eric Holm
- http://www.eyetone.net
-
Contributing Architect:
- Bill Riddle
- riddleaia@earthlink.net
-
- http://shattuckrenovation.blogspot.com
Owner’s Blog
-
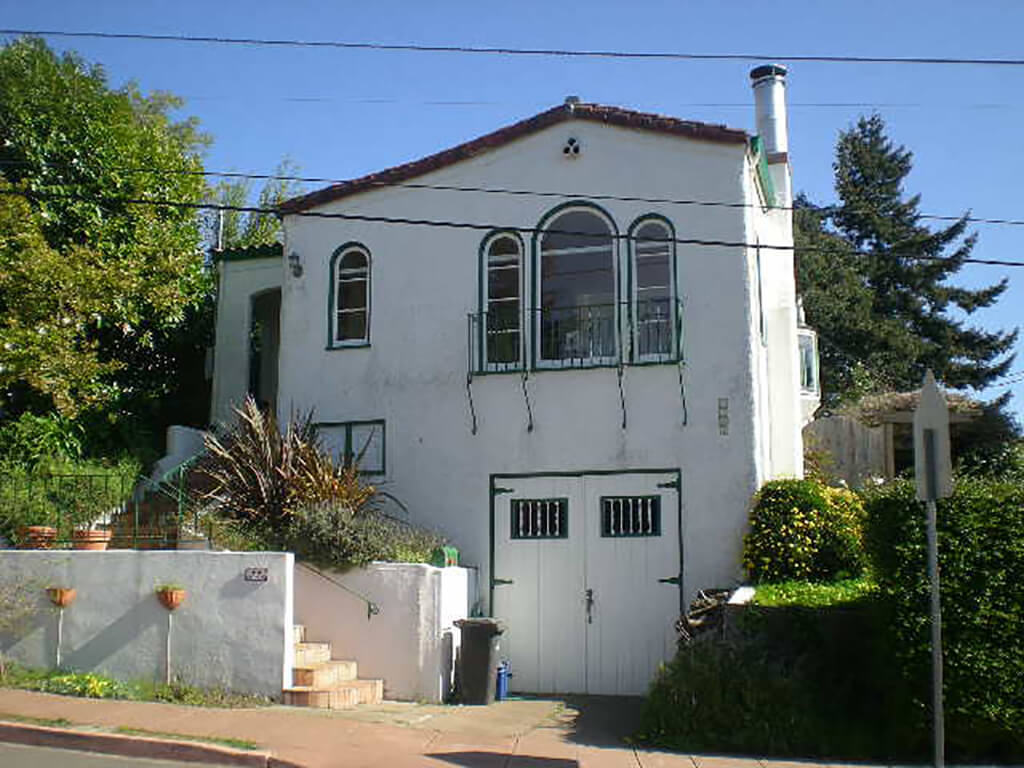
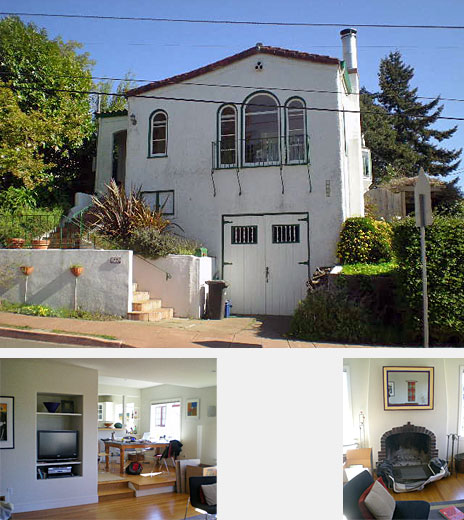 Shown here is the house before we began work. At the exterior we stripped off the stucco, changed all the windows from rounded to rectangular, removed the Spanish roof tile, replaced the garage door, the front door, and reconfigured all the front planters and landings. At the interior we gutted everything down to the studs on the upper level and excavated the new lower level doing a full interior renovation. Even the brick on the fireplace was stripped off and replaced with blued steel.
-
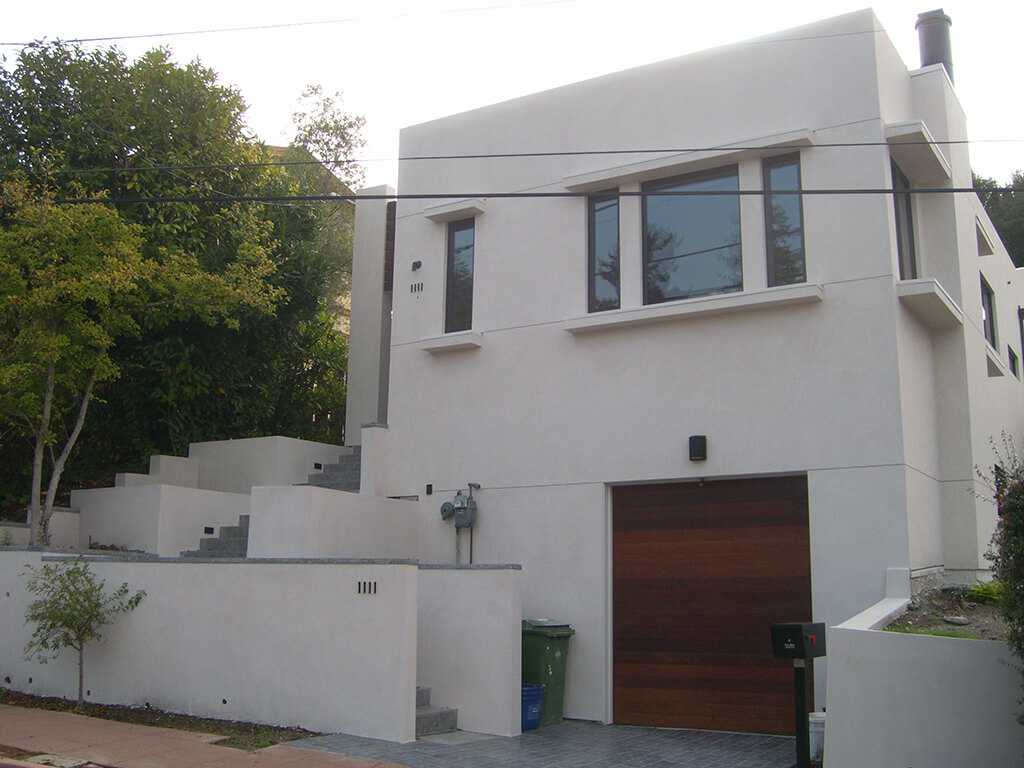
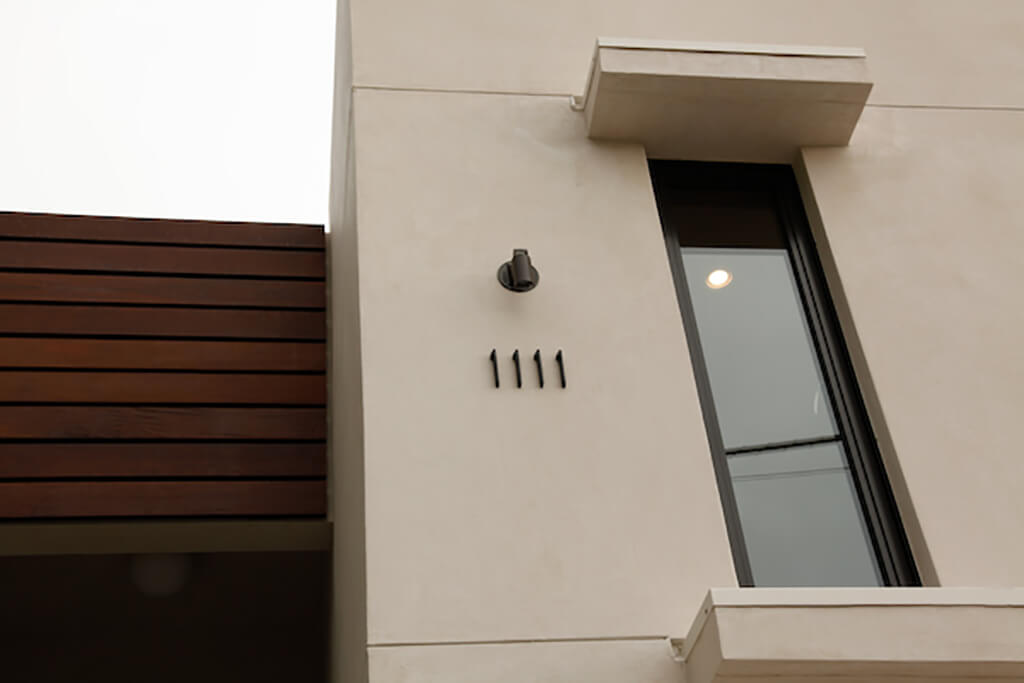
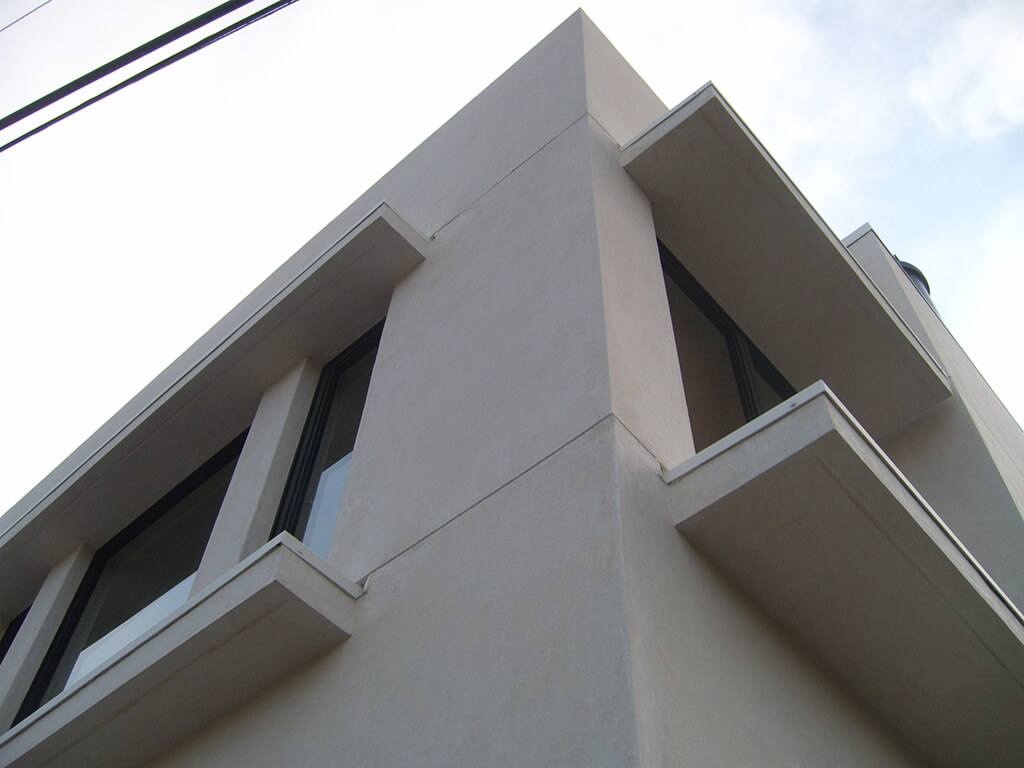
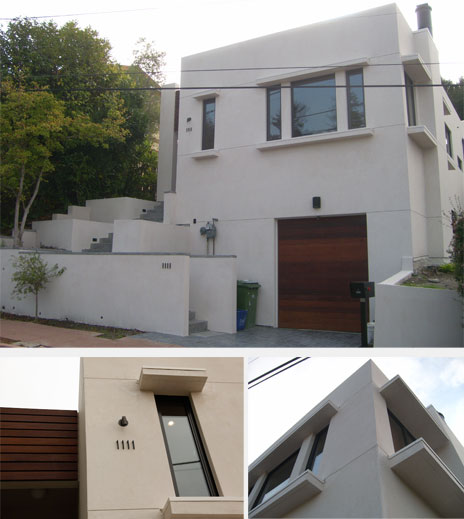 Shown here is the house after the work was completed. We squared off the angled roof with a rectangular parapet. We replaced all the exterior stucco. Previously it was a strongly textured pattern. The new stucco is an integral color smooth finish. Ipe wood accents were provided at the garage door, main entry door, and wood slats over the front entry. The new windows are metal with a powder coated finish. At the living room window upper and lower “eyebrows” were installed for additional scale.
At the interior we completed a full renovation including replacing the red oak flooring with new mahogany floors at the upper level and limestone tile at the lower level. All cabinets were custom built in mahogany to match the floors. The renovation also included installation of radiant heat throughout the house. -
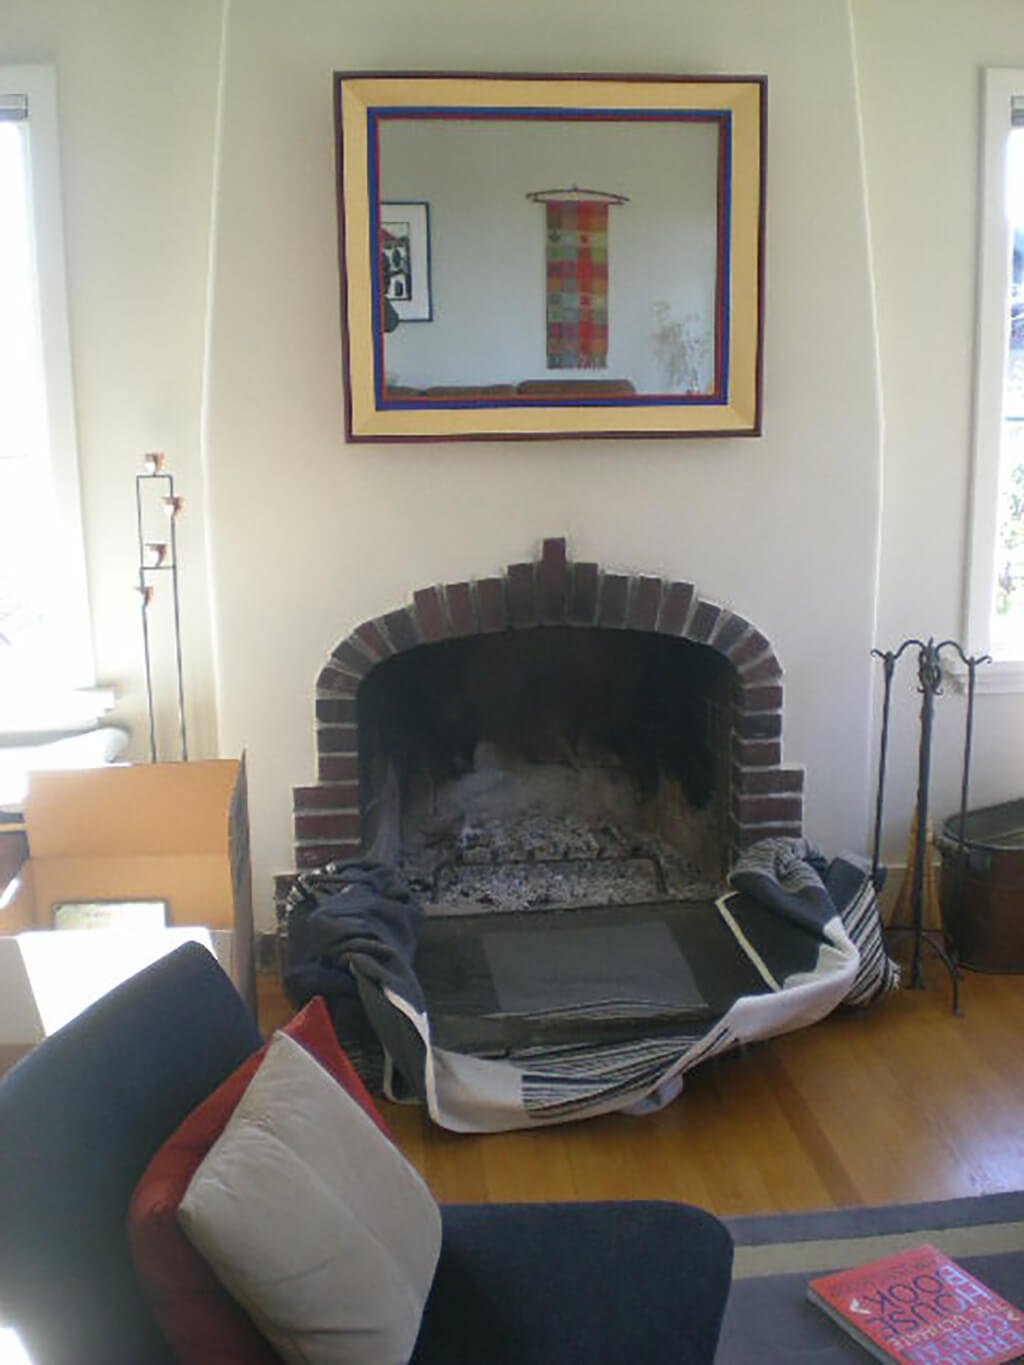
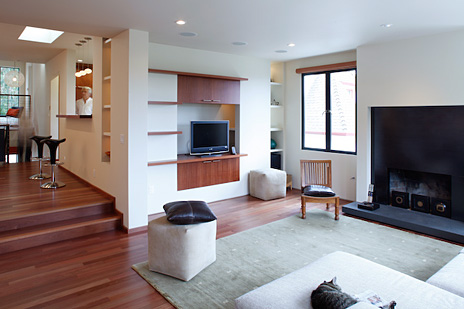 At the living room, we stripped the chunky Spanish brick off of the existing fireplace and installed a blued steel cover and a floating stone hearth. Mahogany floors were used throughout the house and echoed in the custom cabinetry. Shown here is the media center with floating mahogany shelves and operable cabinet drawers above and below the entertainment area.
-
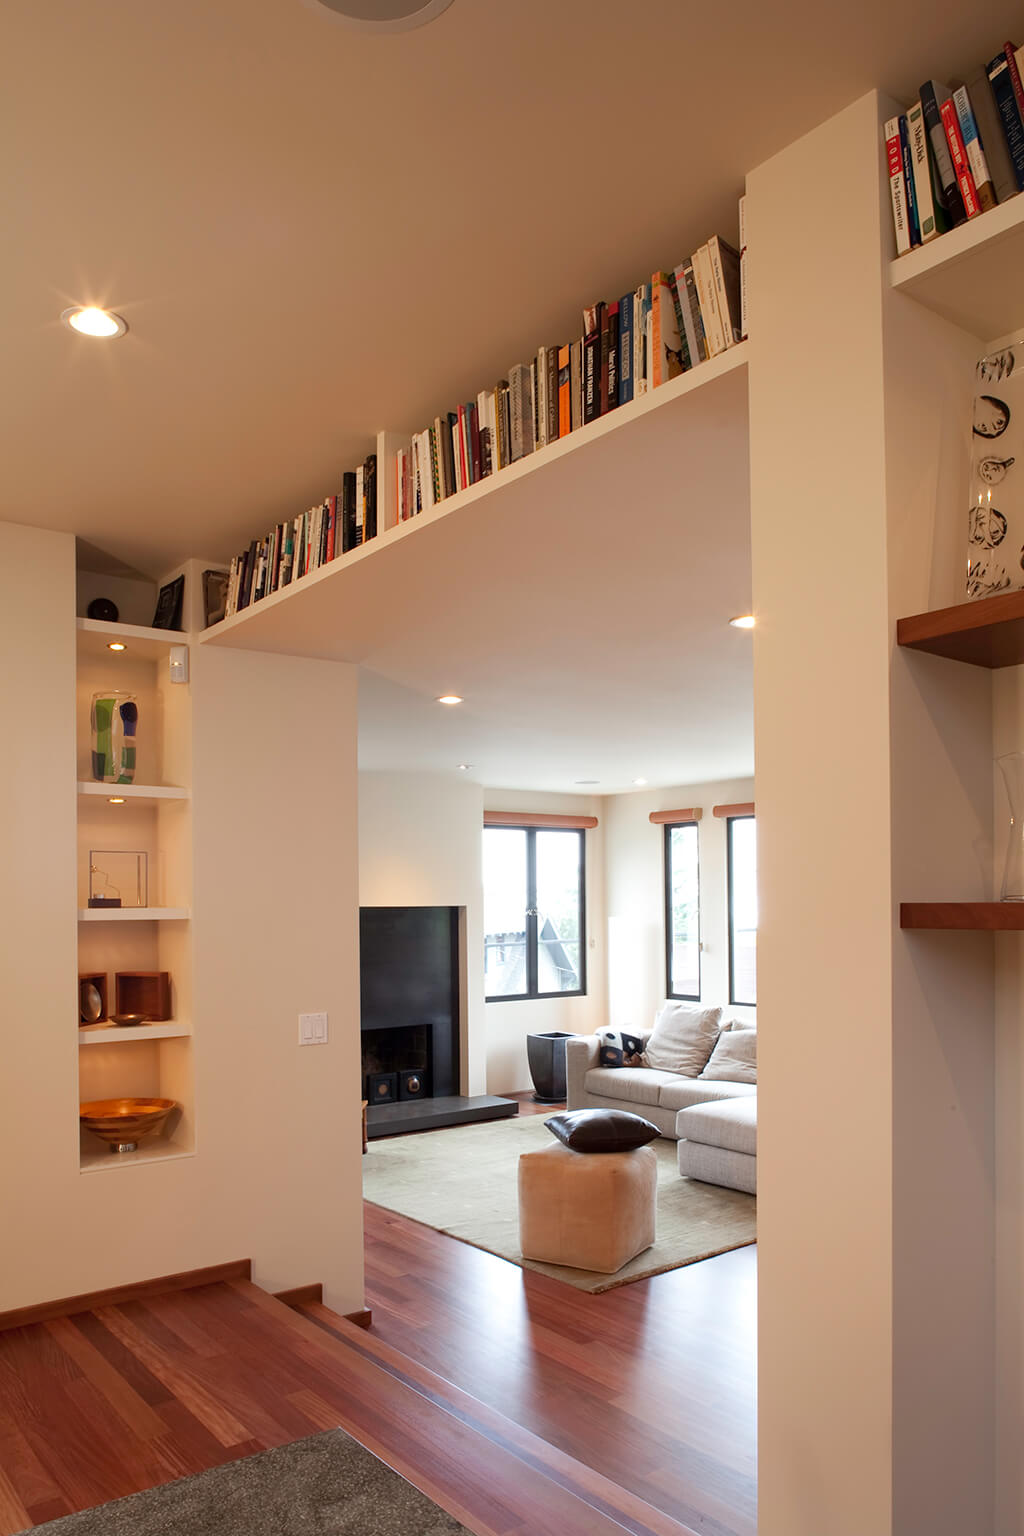
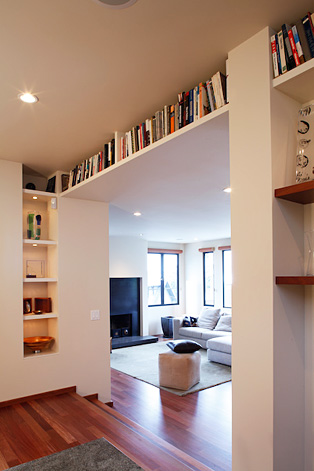 The main floor of the house is built on three different levels. The change from one to the next is about 12" at each location but we wanted to connect them together. We continued the ceiling plane from the lower level through to the upper area creating storage and bookshelves, complete with halogen accent lighting.
Providing necessary storage in a way that was thoughtful and tied into the architecture of the space was an important design element in this house. We found many creative locations to provide recessed shelving, lighting, and storage. Shown here is the new dining area looking toward the living room. -
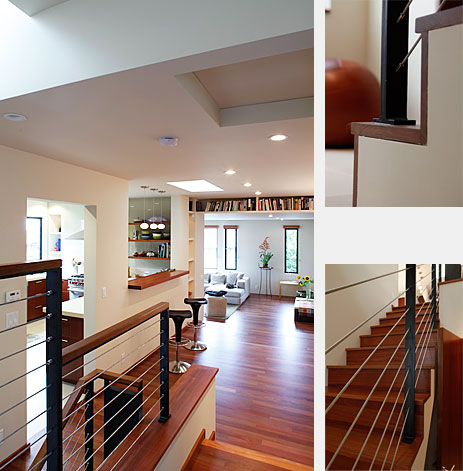 Looking from the uppermost level back toward the living room, you can see the two skylights. One is located above the stair and the other is centered over the bar counter between the dining area and the kitchen.
In order to make the modest home feel larger, we opened the ground floor all the way up from front to back. There is visual access all the way through the house. In the dining room, we also opened up the wall into the kitchen with a thick mahogany butcher block and skylight above.
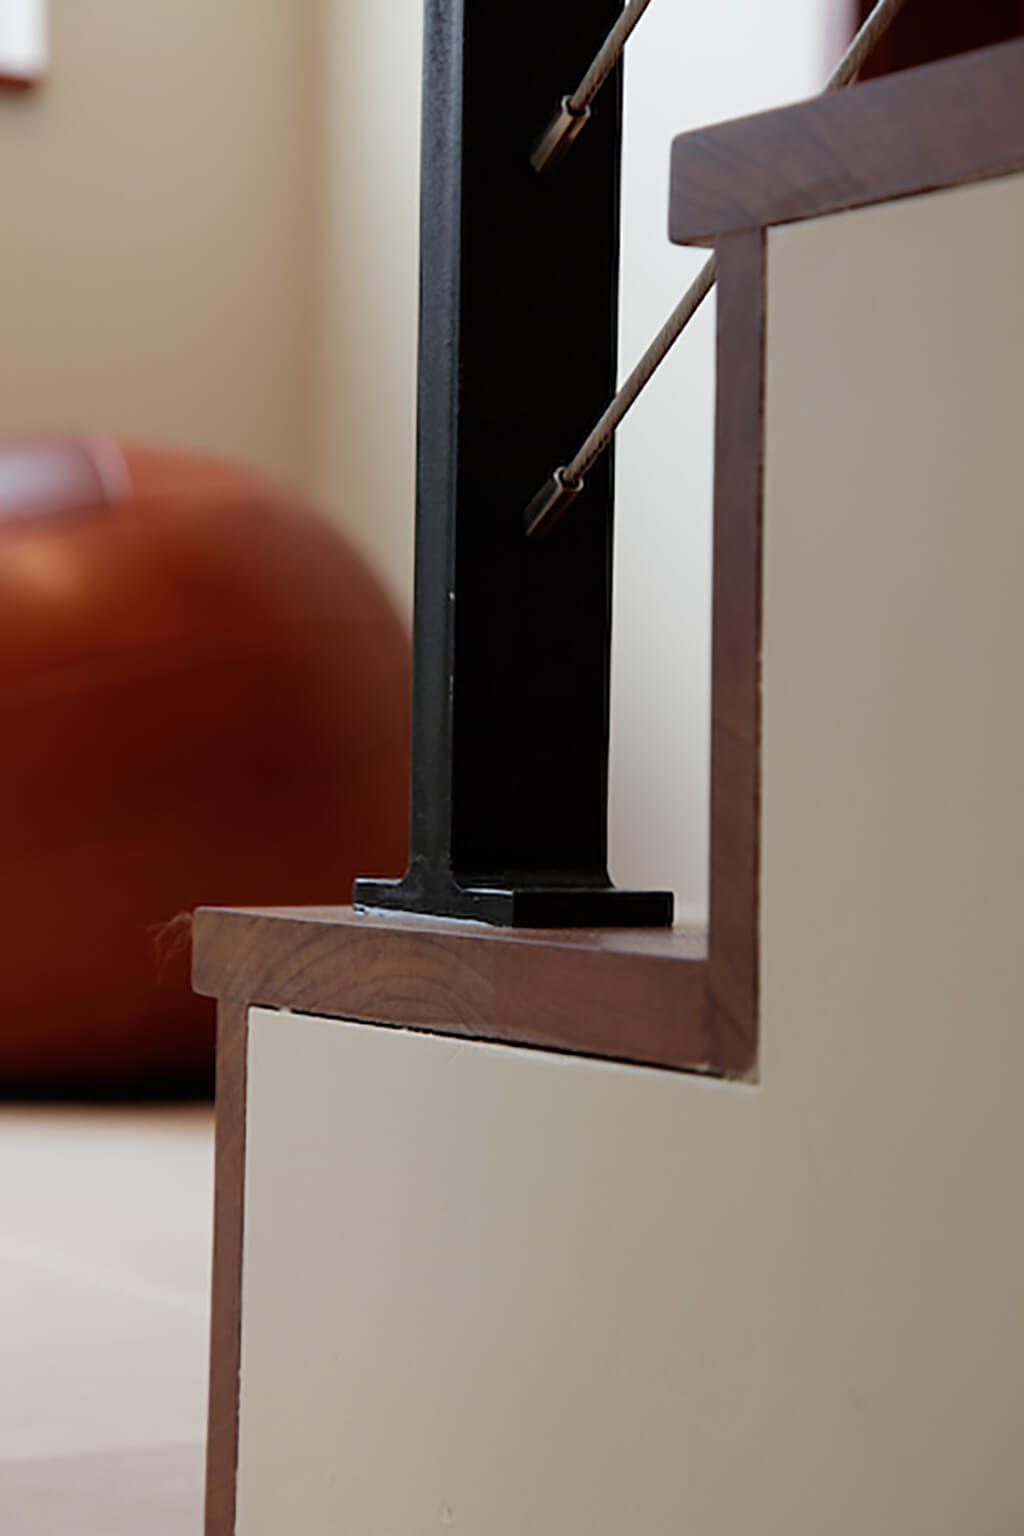
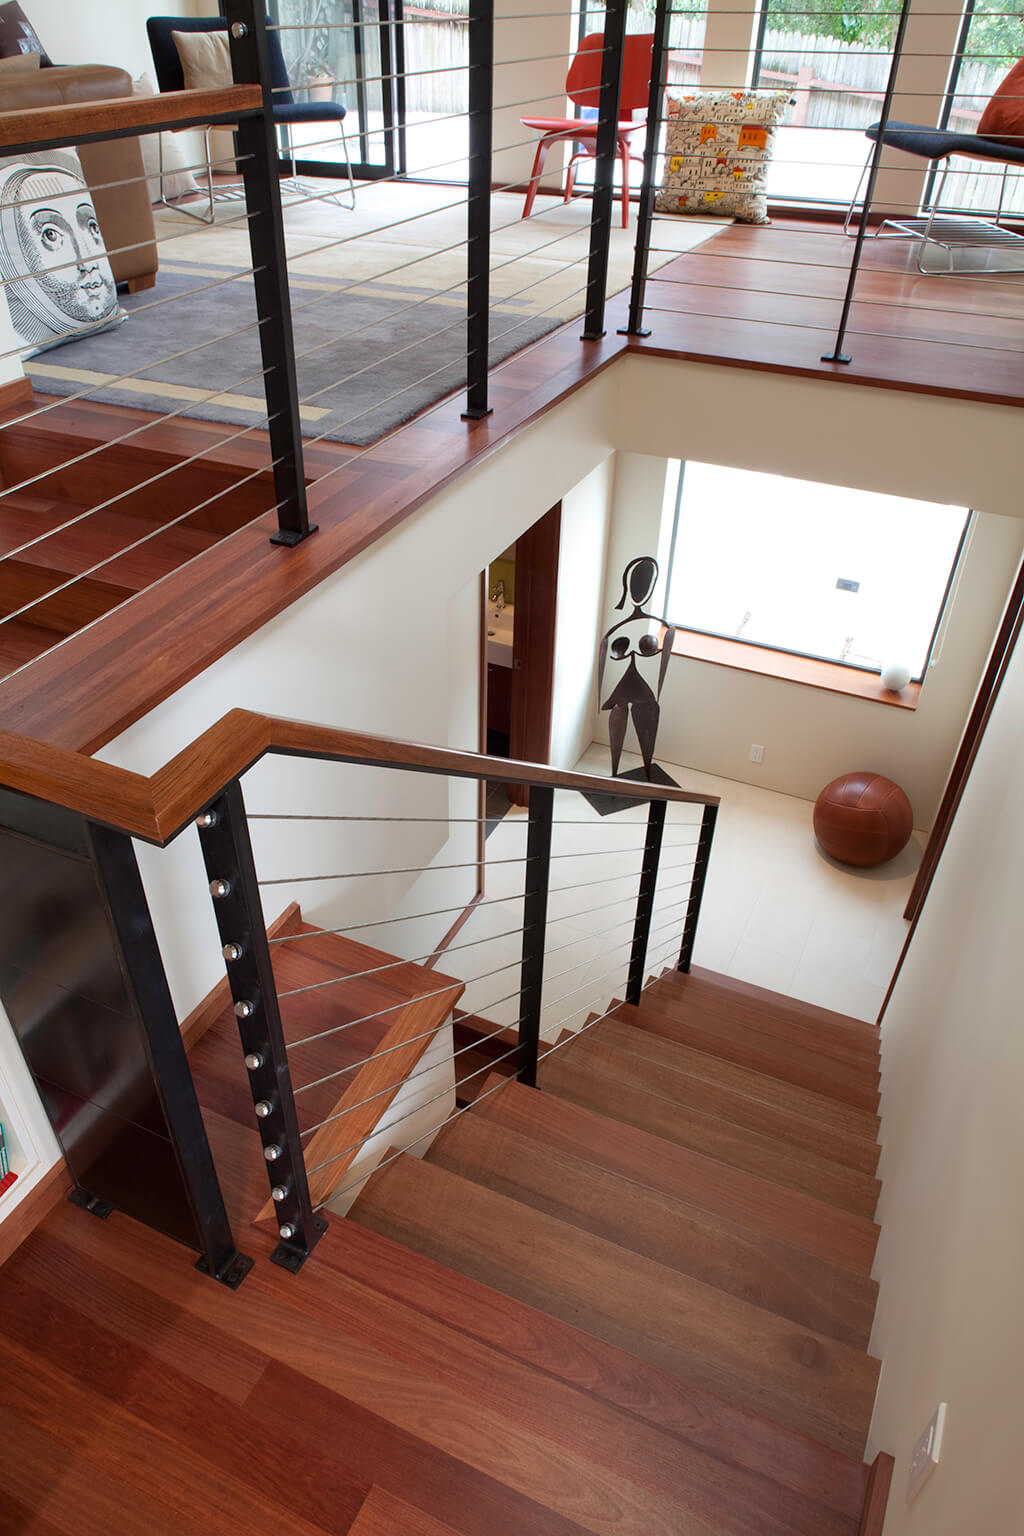
At the stairs we used blued steel handrails and used cable rail for the horizontal components. At one location, shown here, we had a small guardrail and chose to utilize a solid blued steel panel to match the fireplace. To tie the stair components together, we placed a simple mahogany cap at the top of the railings to match the new mahogany floors. -
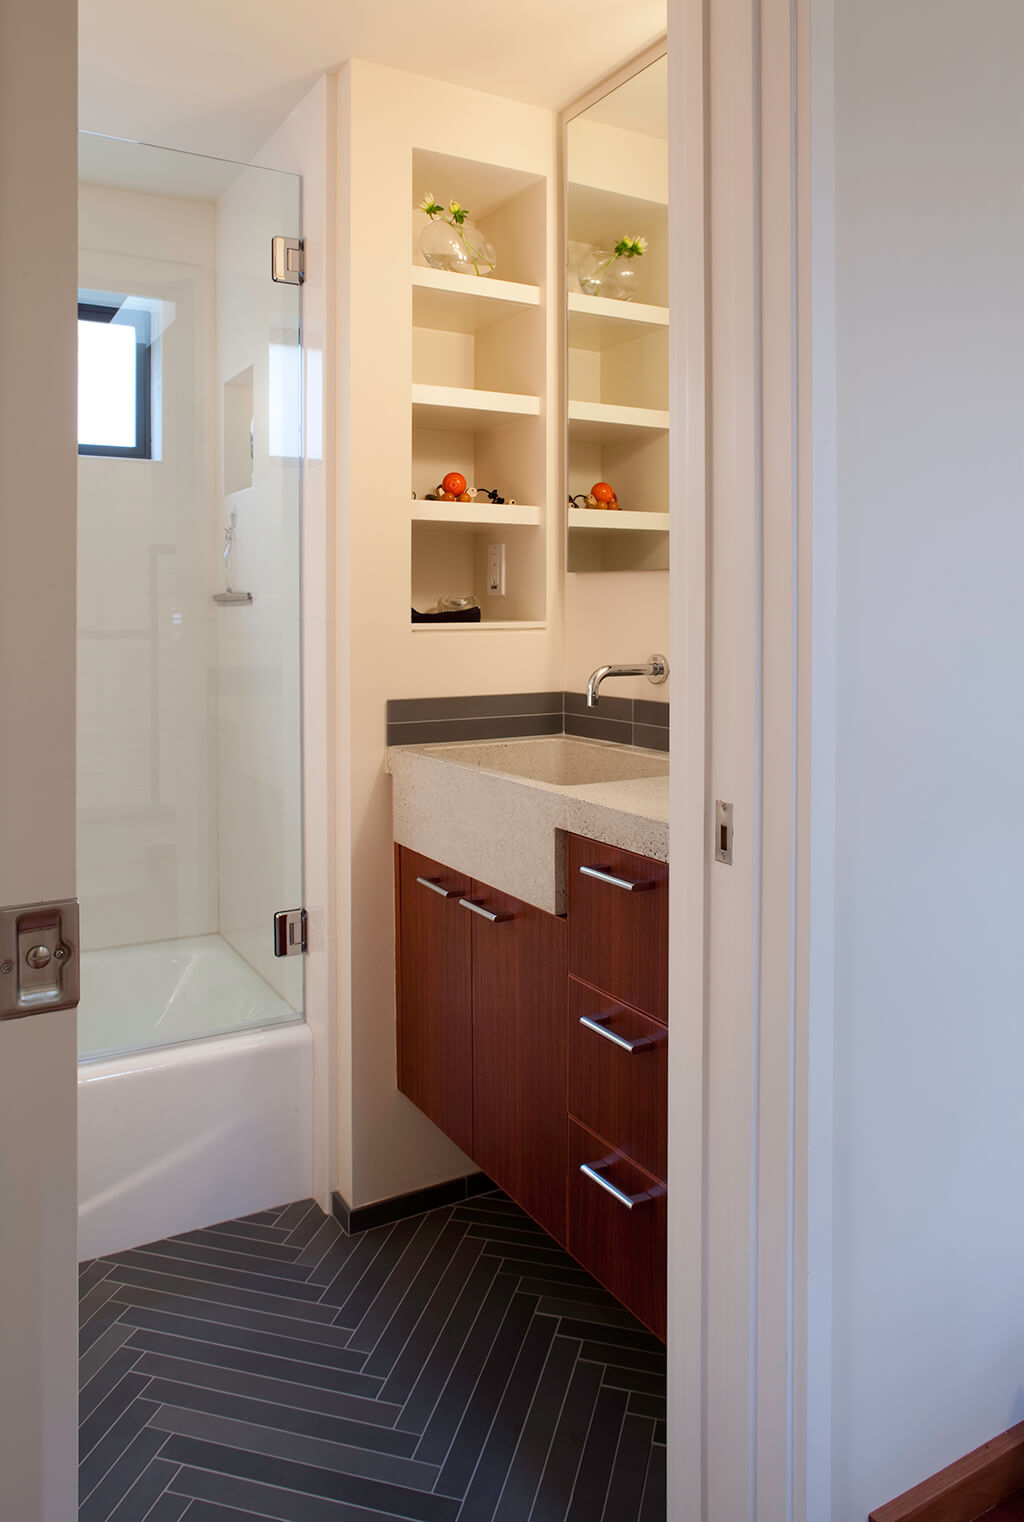
 At the guest bath, we installed a simple limestone floor tile in a chevron pattern. Also, we used a floating mahogany cabinet and custom concrete sink. We took advantage of storage opportunities everywhere possible; here you can see shelving recessed into the wall at the foot of the tub. Inside the tub, all the tile joints are aligned; even to the extent of being centered on the shower standard equipment. We also recessed a portion of the tile wall for shampoo bottled; not shown here.
-
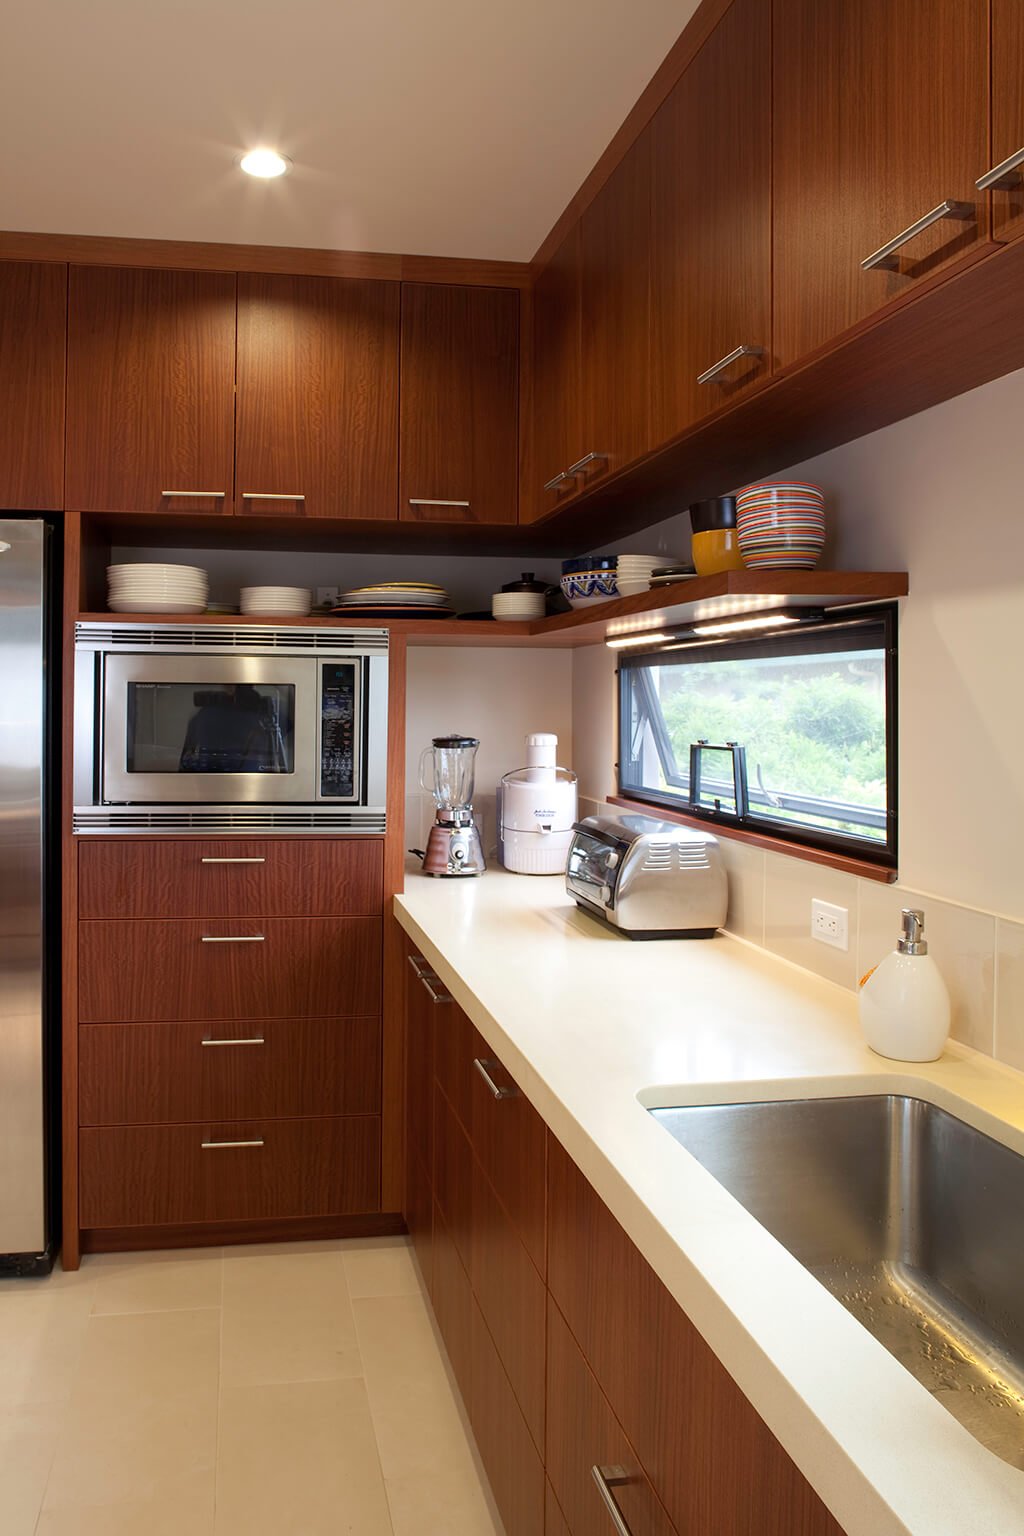
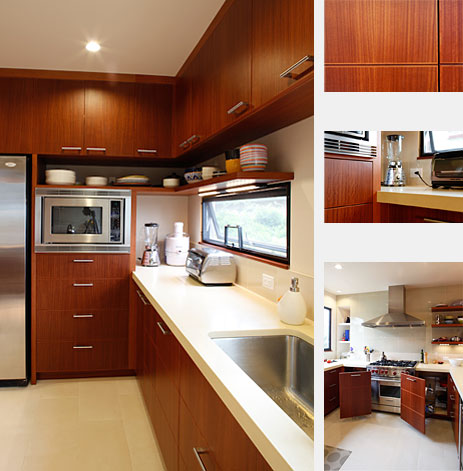 In the kitchen, we installed limestone flooring and custom mahogany cabinets. Alignments were critical to the refined success of this project. Here we carried a floating mahogany shelf over top of the convection oven and tied it to the top of the new window. Also, the bottom of the window was coordinated with the top of the tile backsplash. Finally, the horizontal feel was carried around the kitchen by utilizing a small groove in the face of all the cabinet doors to match the drawer heights throughout the space.
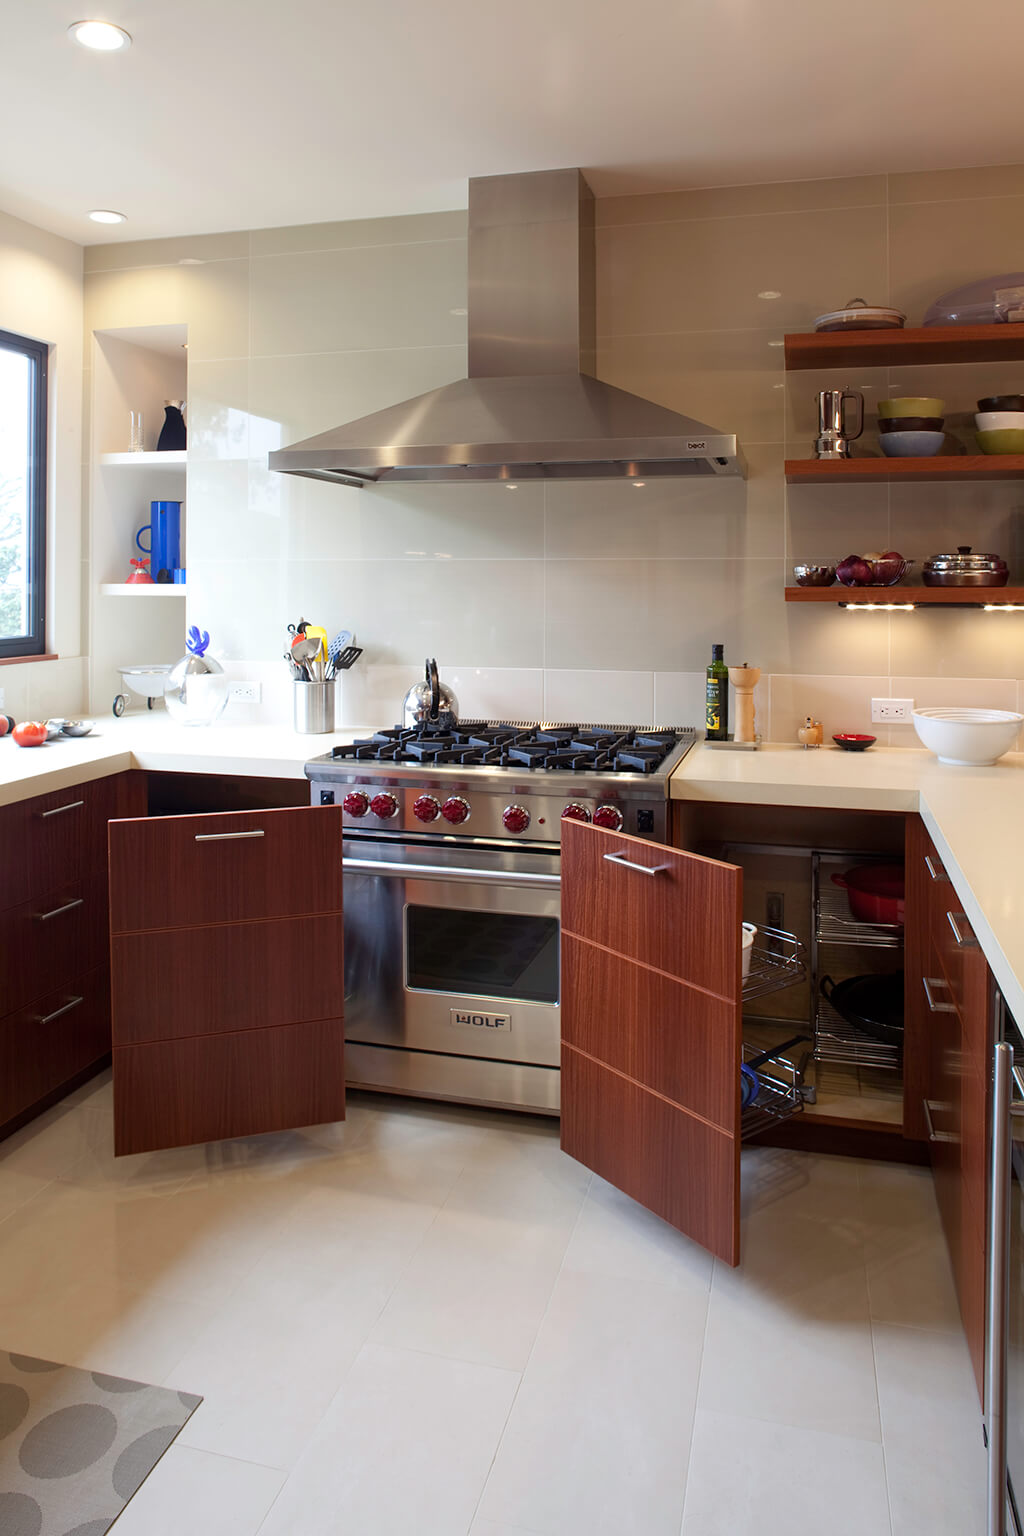
To maximize storage, we installed special hardware into the corner cabinets so the shelves pull all the way out. That way access to the items stored in the far back becomes much easier. We also installed a pull out spice rack and pull out trash storage as well; not shown here. -
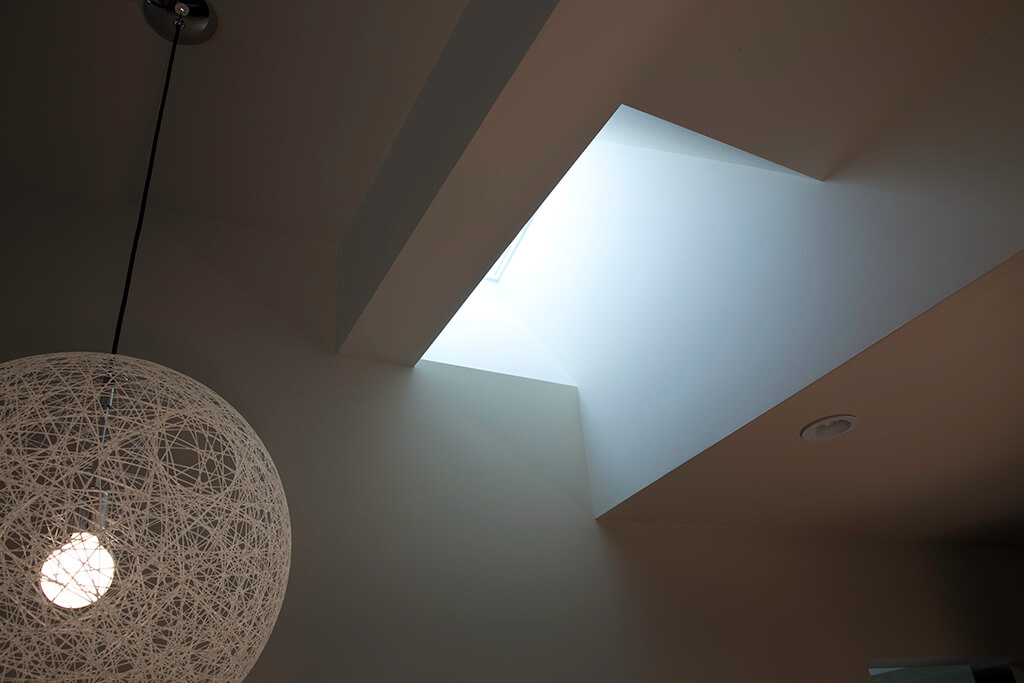
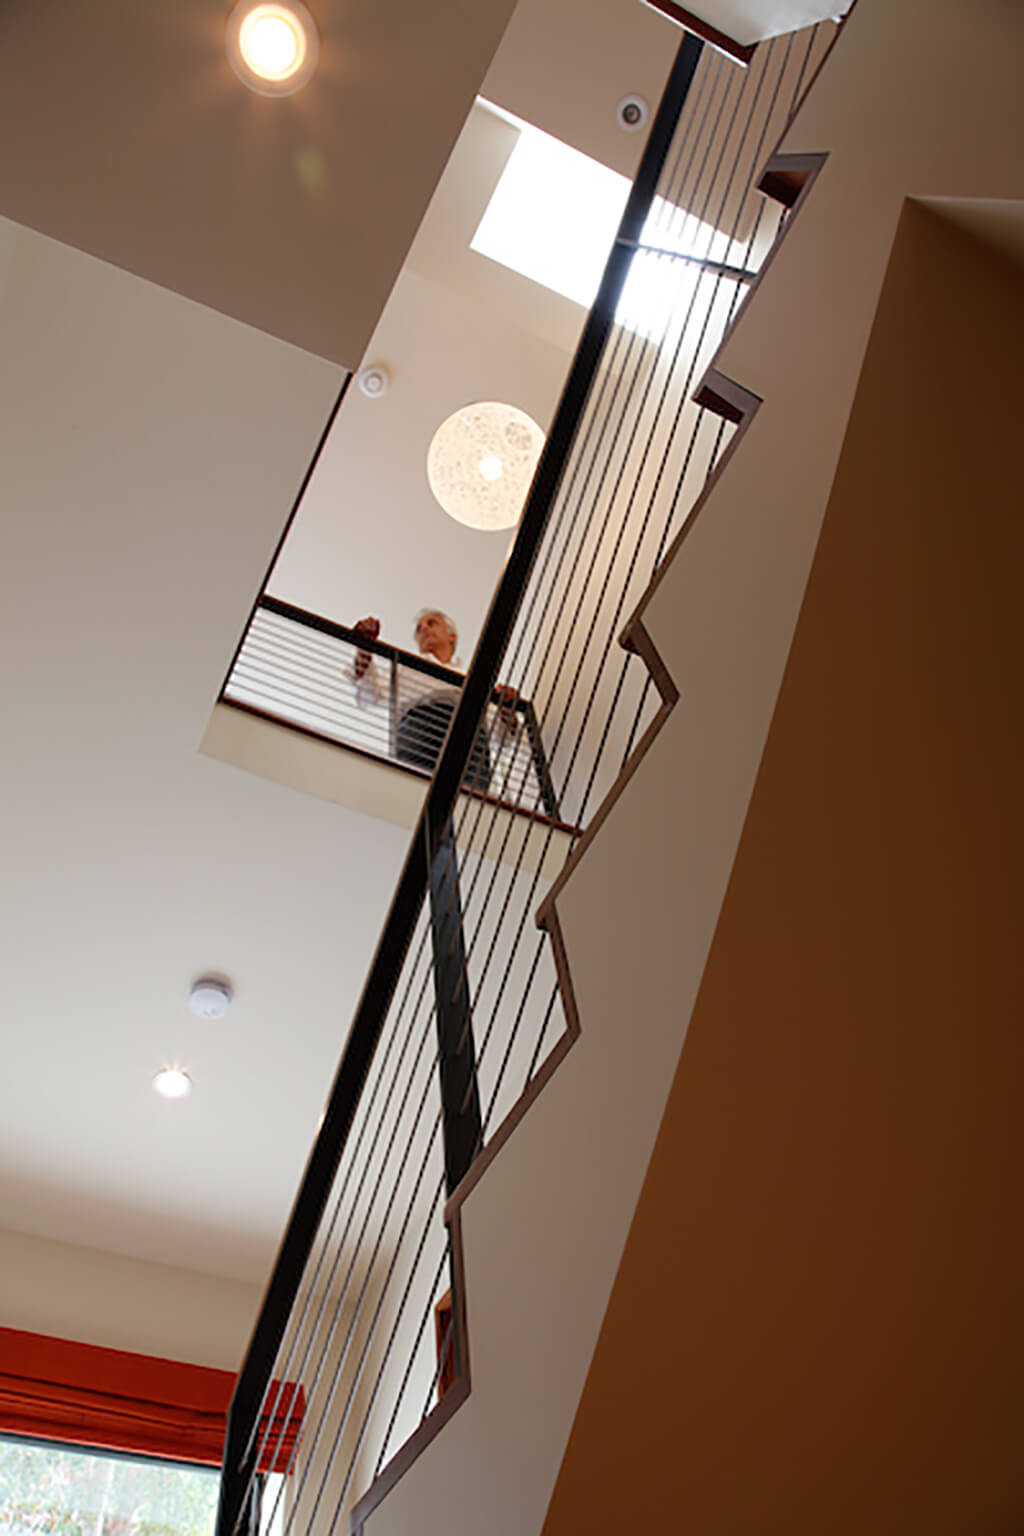
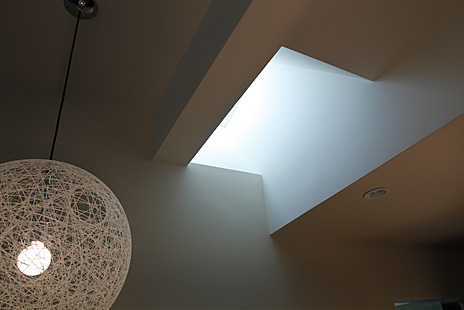 Because the rhythm of the spaces was so simple, we got playful with the skylights. The contractor created very interesting geometries leading from the ceiling plane up through the attic to provide for more light bouncing surfaces and additional visual interest. Dramatic light fixtures in key locations were also used. Here, a beautiful floating fixture extends over the highest floor plane at the full height volume of the stair.
-
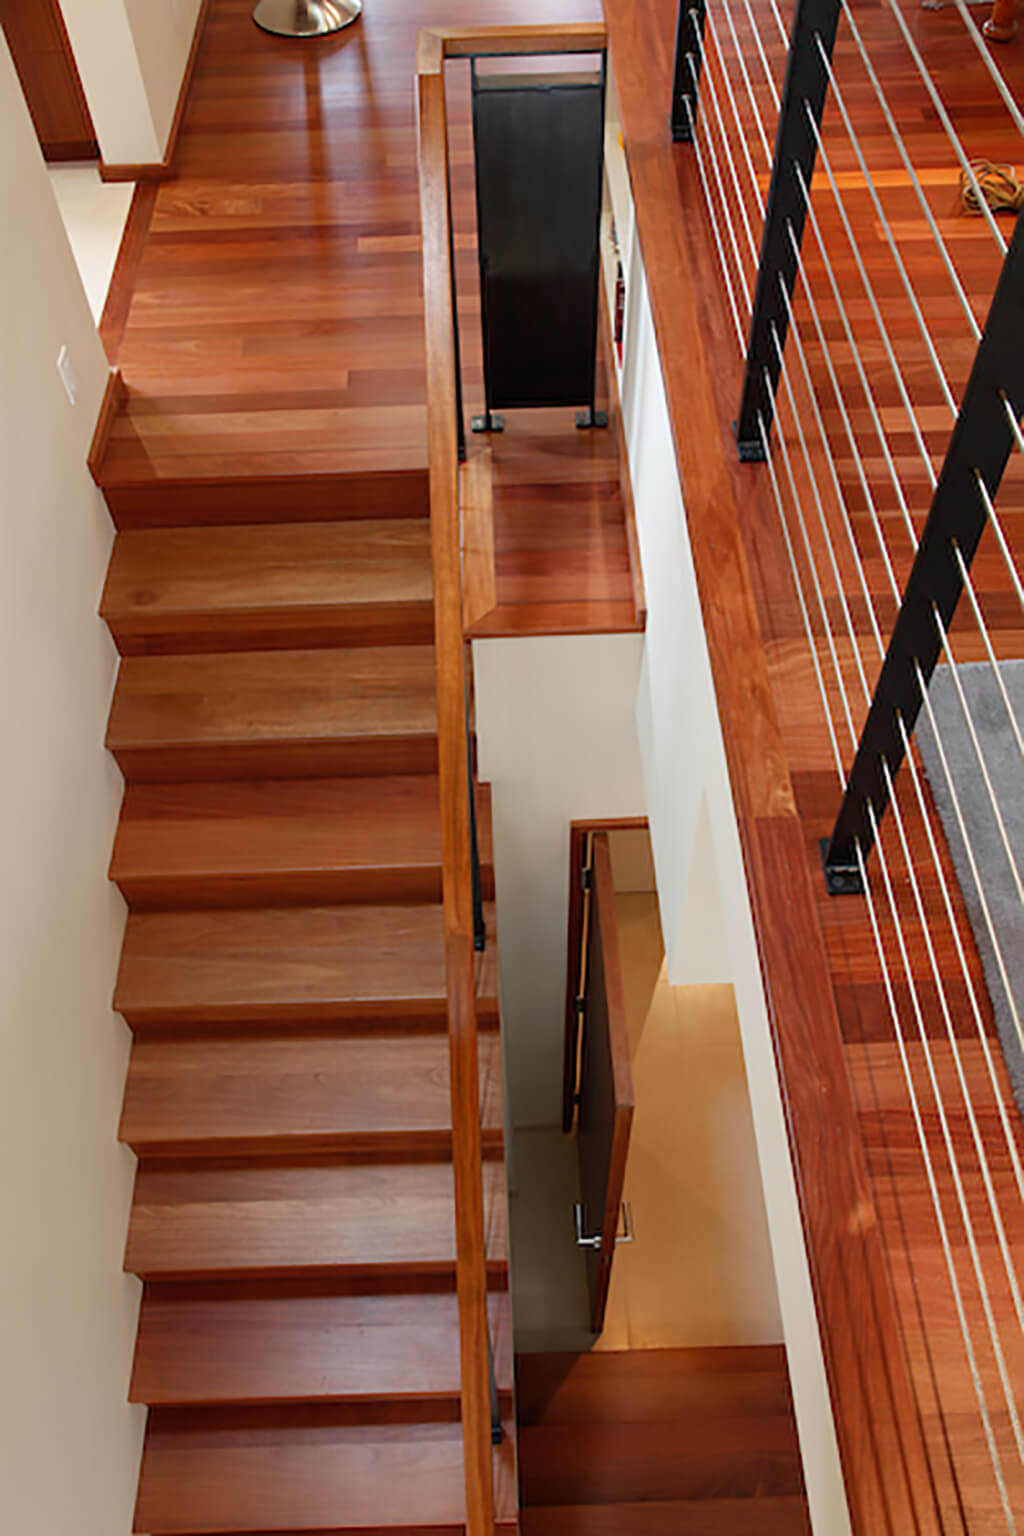
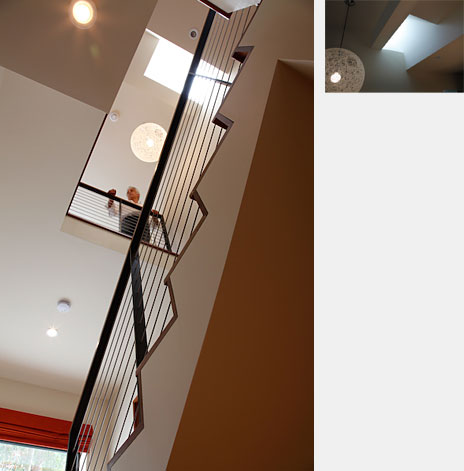 We kept the stairs as simple as possible. We used the same mahogany flooring on all the treads and risers and cut the sheetrock right up to the line of the treads, creating a clean simple line where the stairs occurred. Shown here you can see all the way up into the skylight above at the upper floor.
On the right is a view of the skylight and unique light fixture at the upper most level. -
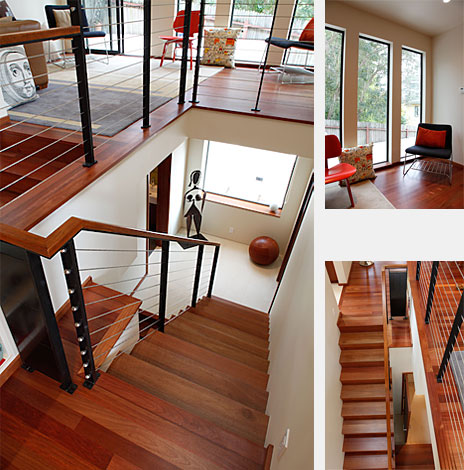 Shown at top of the stairs, you can see the mahogany treads, the cable rail and blued steel guardrail/handrail and the matching mahogany cap.
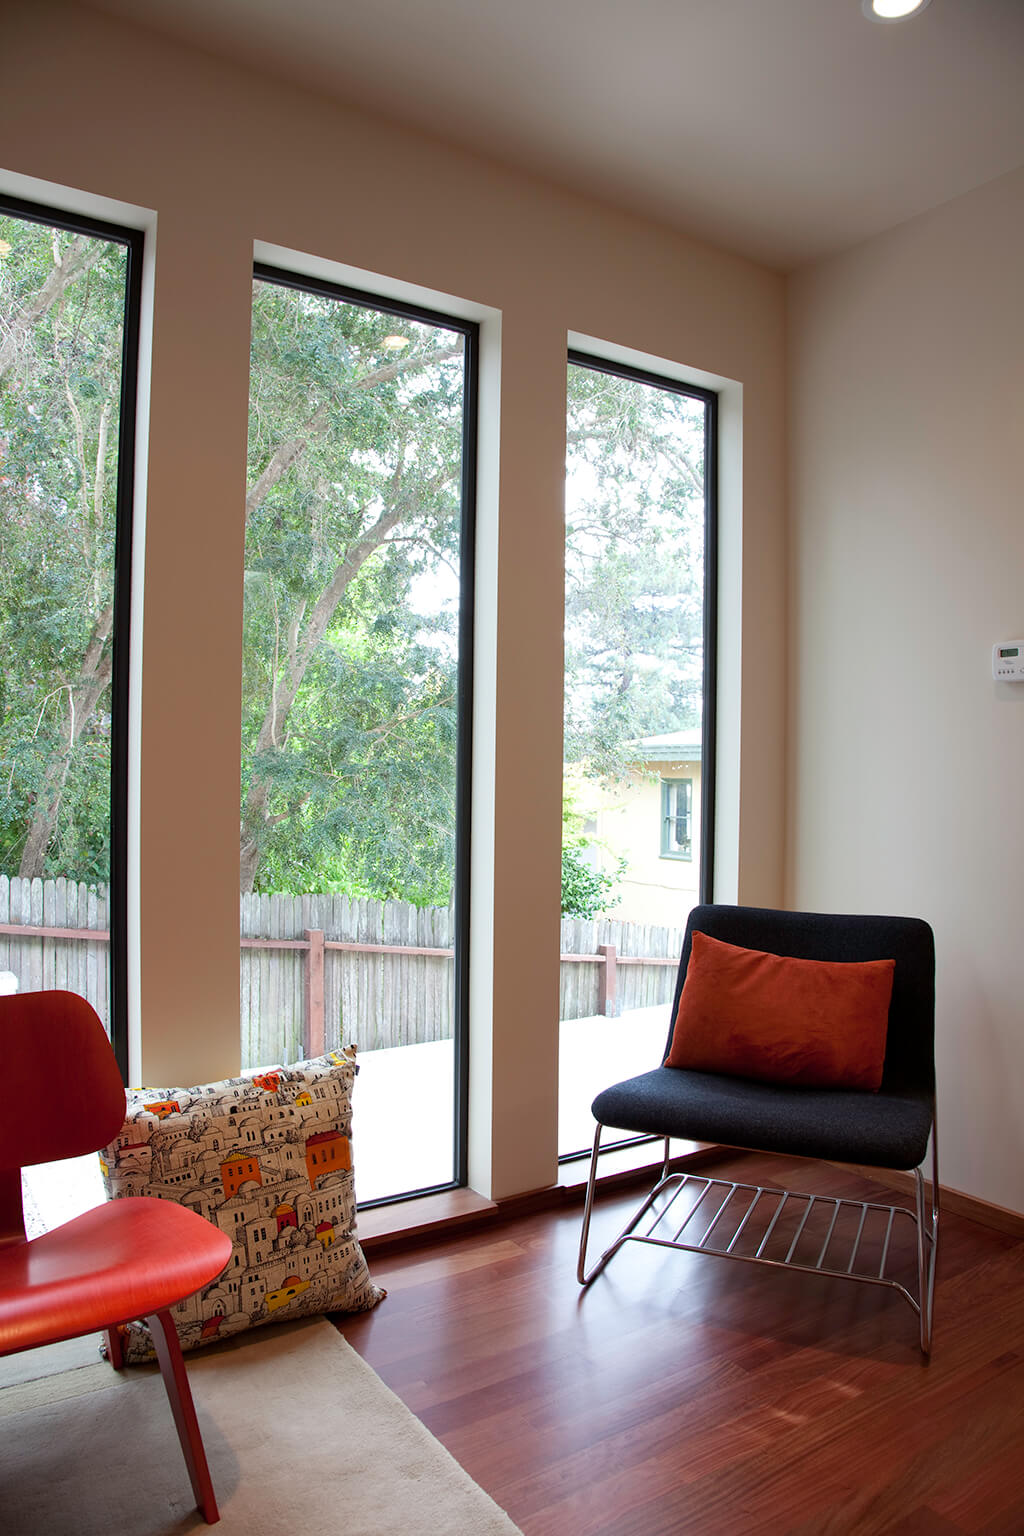
On the top right you can see the full height windows at the upper landing in the den area. These windows can be viewed all the way from the front of the house and look out to the rear yard. This feature provides light all the way through the space. The windows overlook the newly designed rear yard with sandstone planters, stairs, and a wraparound ipe bench.
On the bottom right side you can see the stair from the top landing all the way down to the lowest level where the door to the Master bedroom is open. -
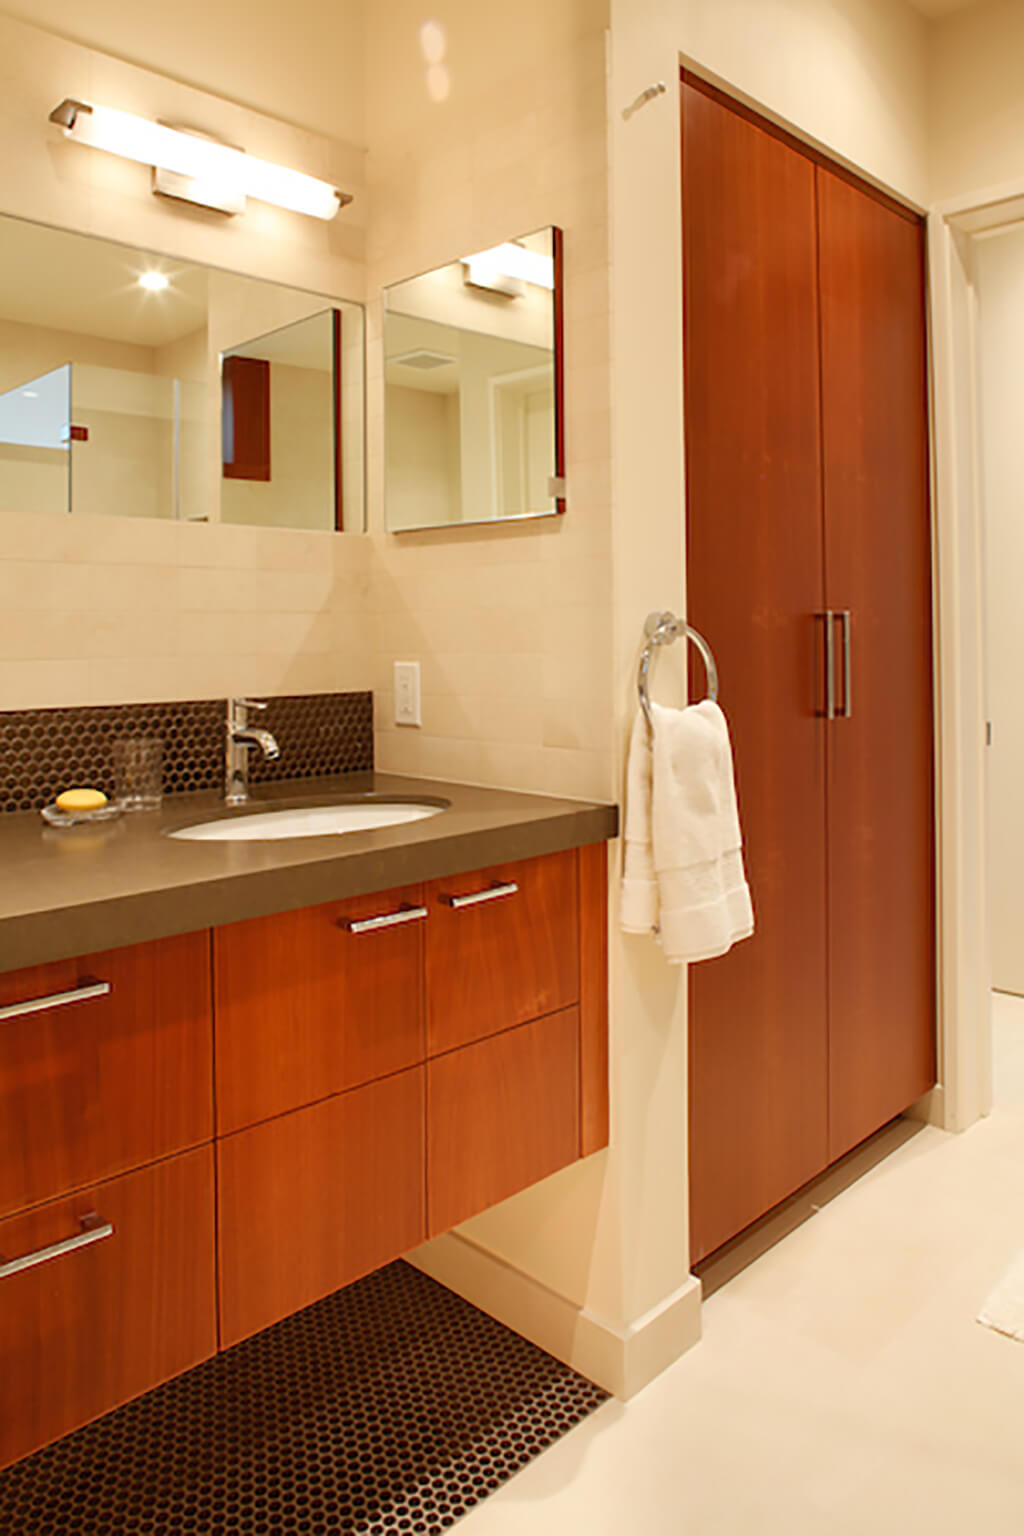
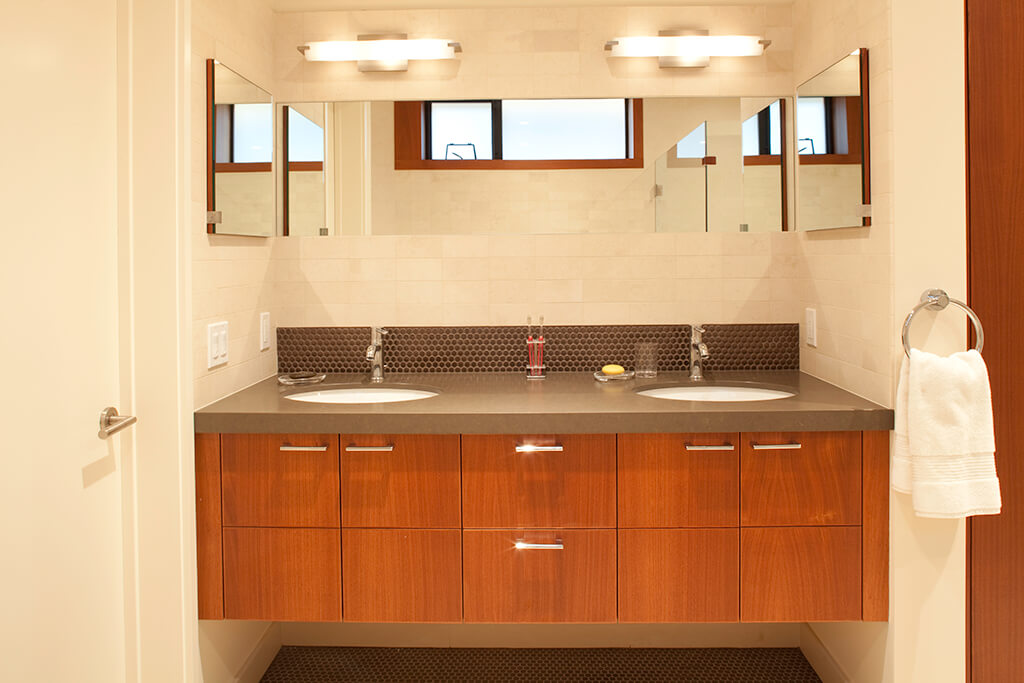
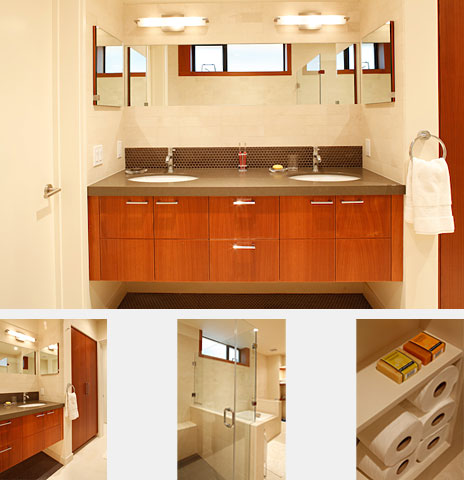 The master bath included limestone flooring and tile. At the vanity, we utilized floating mahogany cabinets and used a copper penny round tile at the floor below the vanity and at the backsplash. Again, alignments were critical here. The mirror, side medicine cabinets, and wall tile joints all align around the entire alcove.
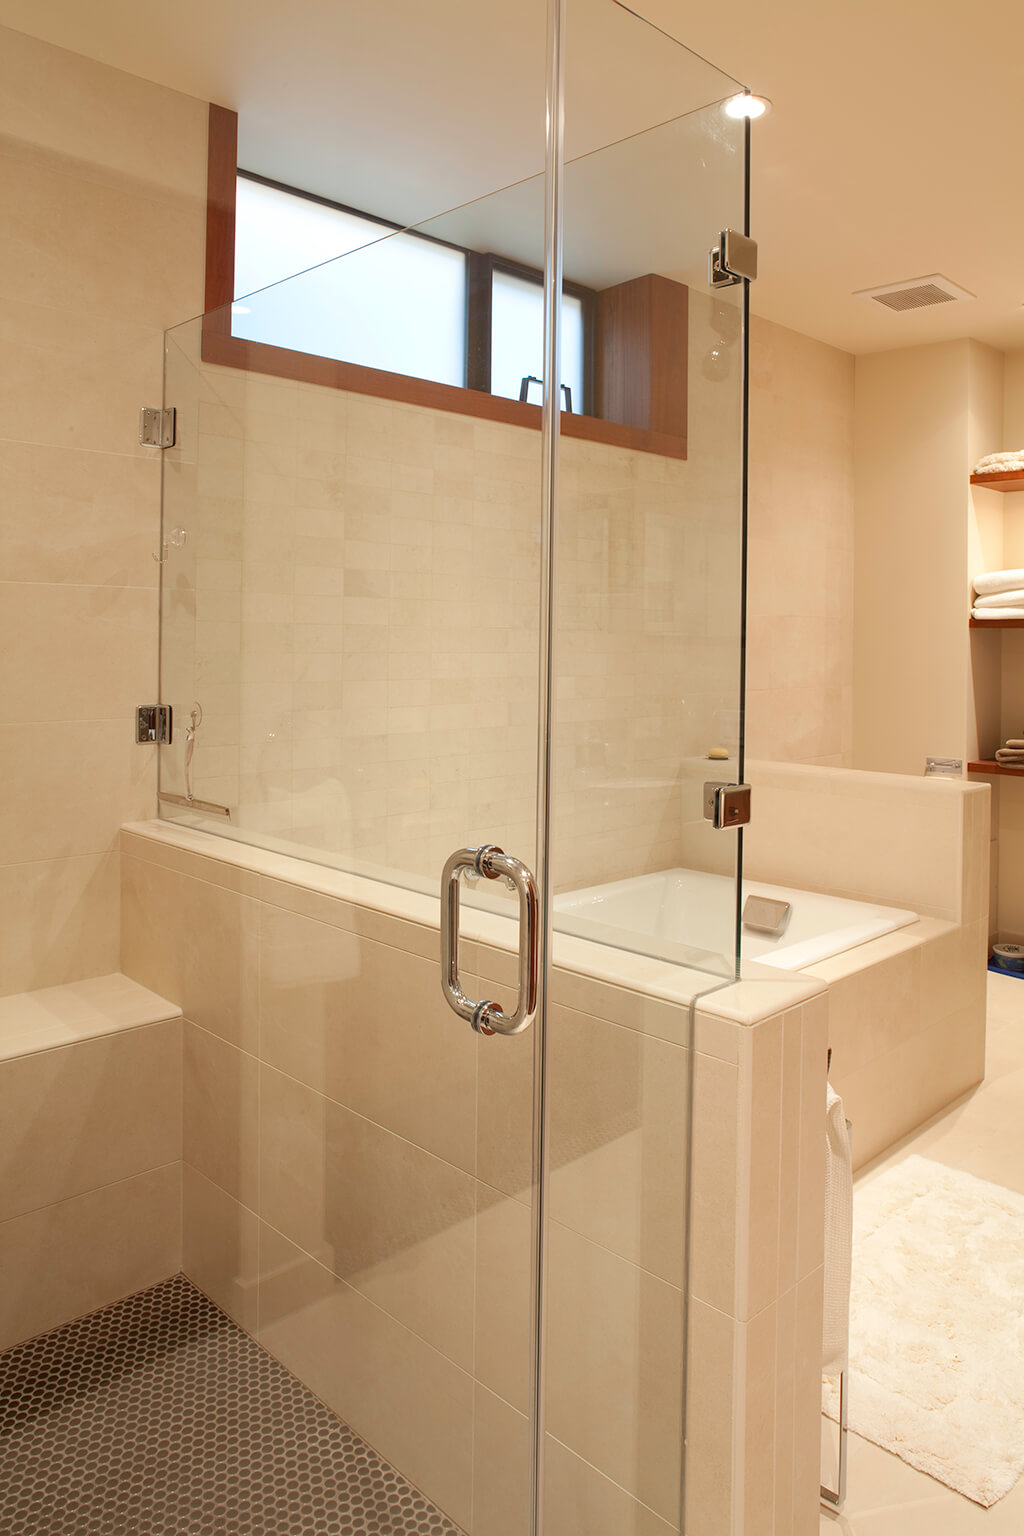
We installed a separate shower and oversized tub in the master bath. Again, all the tile joints align and track around the space. In the shower we used a large porcelain tile to match the limestone and, for texture, installed copper penny round tile on the floor of the shower pan. At the window, we tucked it right up to the ceiling line and cased the opening in mahogany to pull all the mahogany accents and limestone together through the space. The window, master tub, and adjacent vanity are all aligned across the space.
In our first meeting, the Owners showed me a magazine image of a fun toilet paper storage recessed into a wall. At the foot of the master tub, we incorporated this detail into the low wall adjacent to the toilet.